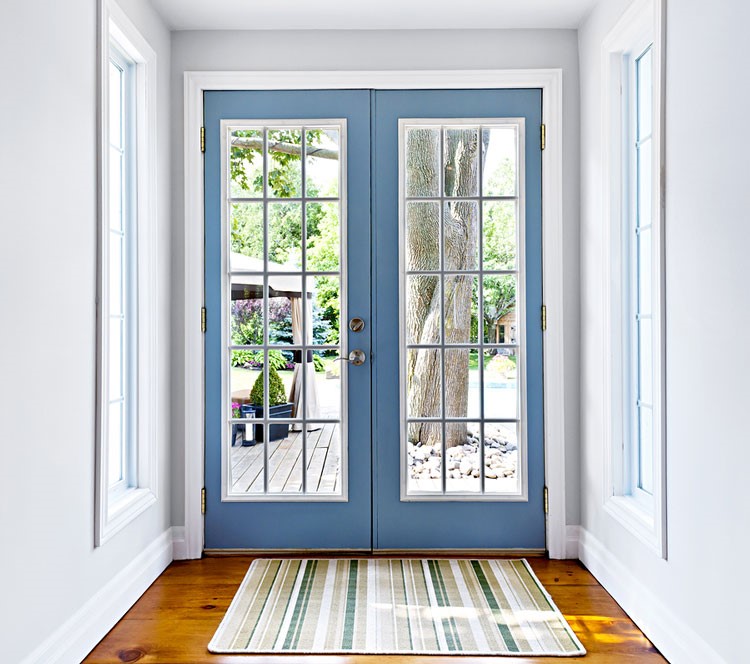
French doors are one of the most iconic and fashionable ways to divide a room or open it up to the outdoors. A French door is, in colloquial terms, a door made up of windows. The door frame supports panels of glass that are fitted into either aluminum or wooden structure. Though it may look simple enough, building a French door requires careful planning and milling parts needed to make it whole.
Since French doors are mainly created to protect against outside elements, it makes total sense to build them out of mahogany or white oak, both of which are resistant to rot. You’ll also need a special router bit set that’s designed to make French doors easier to manufacture. Rounding out the materials are the following- a router table with a midsize router featuring variable speed control, a jointer, a planer and a table saw.
Here’s a step by step example of how to build a French door:
Constructing the Stave Core
Step 1. Take your best boards and resaw them to create face veneers for the rails and the stave core stiles. The technique is important because it lends the stress-relieved boards the toughness to resist against twisting and bowing.
Step 2. Keep the board flush using the angle iron. Glue the rail cores and the stiles. The cores should be made from 3/4 boards that are width-ripped and face-glued.
Step 3. Glue the face veneers to the core to finish assembling the stave core. An I-beam clamping caul can do a lot in creating perfectly flat finishes.
Prepare and Set Up for Routing
Step 4. Do an inspection of the router table and check if the bits are squared. This process ensures the routed joints will fit together perfectly.
Step 5. Make the set-up board via stick cutter installation. Raise the bit up until you reach 9/16 on the bottom slot cutter in relation to the table’s surface. The process sets up the bit positions for creating 1 3/4 thick stock joints that are used to make the entry doors.
Step 6. Position the fence flush to the bit bearing in order to set the depth of your cut.
Step 7. Make sure to rout your profile in 2 passes. Doing only 1 profile rout will remove too much precious material. Clamp your spacers down to the fence in order to limit the cuts done on the first pass.
Step 8. Take off the spacers. Then, make another pass to detail the profile. You should also finish the set-up board as well.
Rout Tenons on Rails and Muntins
Step 9. Place the offset tenon shoulders to the horizontal muntin blank and the rails. Your front-face shoulders should be farther at the ends than in the middle.
Step 10. Manipulate the coping cutter and rout the tenons off with coped shoulders at the edge of the rails. Set the cutting height and the fence position in accordance to the set-up board made earlier.
Step 11. Cut and rout the layout profiles via smaller, more shallow multiple passes than a huge, deep one. Set your fence to cover one shoulder, then rout out the boards. Do the same for the other shoulder and have at it again.
Step 12. Square the muntin stock and the rail back shoulders using the mortising bit.
Rout Profiles On Inside Edges
Step 13. Cut profiles inside the edges of your stiles and rails with one end of the muntin blank using the stick cutter. You can follow the same procedure as you did the set-up boards.
Step 14. Rip the muntin off the wide blanks a piece at a time. Rout the edge of the blank, then rip it again.
Step 15. Rout the final profiles off the muntin using the coped sled. You can mount a spacer to support your muntin as you make the final pass.
Complete the Tenons
Step 16. Haunch in the tenon and place it on the outside edge of all the rails. Divide the wide tenons on the bottom rail to half.
Lay Out the Mortise
Step 17. Place your mortises in on the stiles. Drill out the material waste via the Forstner bit.
Step 18. Square up the mortises, then widen them to full size using a 1/2 hollow mortising chisel.
Step 19. Place some support up to the horizontal muntins using the coped sled as you square and drill the mortises.
Create the Retaining Strips
Step 20. Rout out the remaining glass retaining strips via the stick cutter. Rout both the wide board edges, then rip off the strips.
The Final Phase of the Assembly
Step 21. Glue the rails and muntins together. Use a stile without any glue to keep the frame perfectly square.
Step 22. Glue the stiles in carefully one at a time. Use water-resistant glue for each stile as they would be invariably exposed to the outside elements.
Step 23. Complete the door using glass and glazing tape. Pre-drill the nail holes to make it easier to install the glass retaining strips. Then, it’s time to make your grand entrance!
Author Bio:
Danny L. Montgomery is the founder and owner of the blog zukzik.com. He is experts of woodworking. He loves to share everything about woodworking.


Loves home. I am here to provide how to make your home a much better place. 🙂 Blogging about HomeDecor, Home Improvements and more.