A dark front walk can make an otherwise welcoming home feel uncomfortable. Guests may struggle to see steps, delivery drivers may miss the safest route, and family members can encounter uneven paving after sunset. Adding more light seems like the obvious answer, but poorly planned fixtures often create a different set of problems: glare, bright spots separated by darkness, light shining through windows, or two rigid rows that resemble an airport runway.
Effective pathway lighting is not about making the yard as bright as possible. It is about guiding movement, revealing hazards, and helping the landscape remain attractive at night.
Walk the Route Before Planning the Lights
Begin at the street or driveway and walk toward the entrance after dark. Follow the same route a first-time visitor would use. Look for steps, changes in paving material, sharp turns, narrow sections, low branches, drainage edges, and areas where plants hide the walkway.
These transition points need attention first. A straight, level stretch may require less illumination than a single step or an unexpected curve. Mark potential fixture positions with small flags so they can be reviewed during daylight.
It is also helpful to look back toward the street. A fixture that appears comfortable when approaching the house may create glare when someone leaves. Good planning considers both directions of travel.
Avoid Placing Lights at Perfectly Even Intervals
Installing identical lights directly opposite one another is an easy layout, but it can make a residential walkway feel overly formal. It also creates repeated pools of light with dark bands between them. The result may be visually distracting without improving safety.
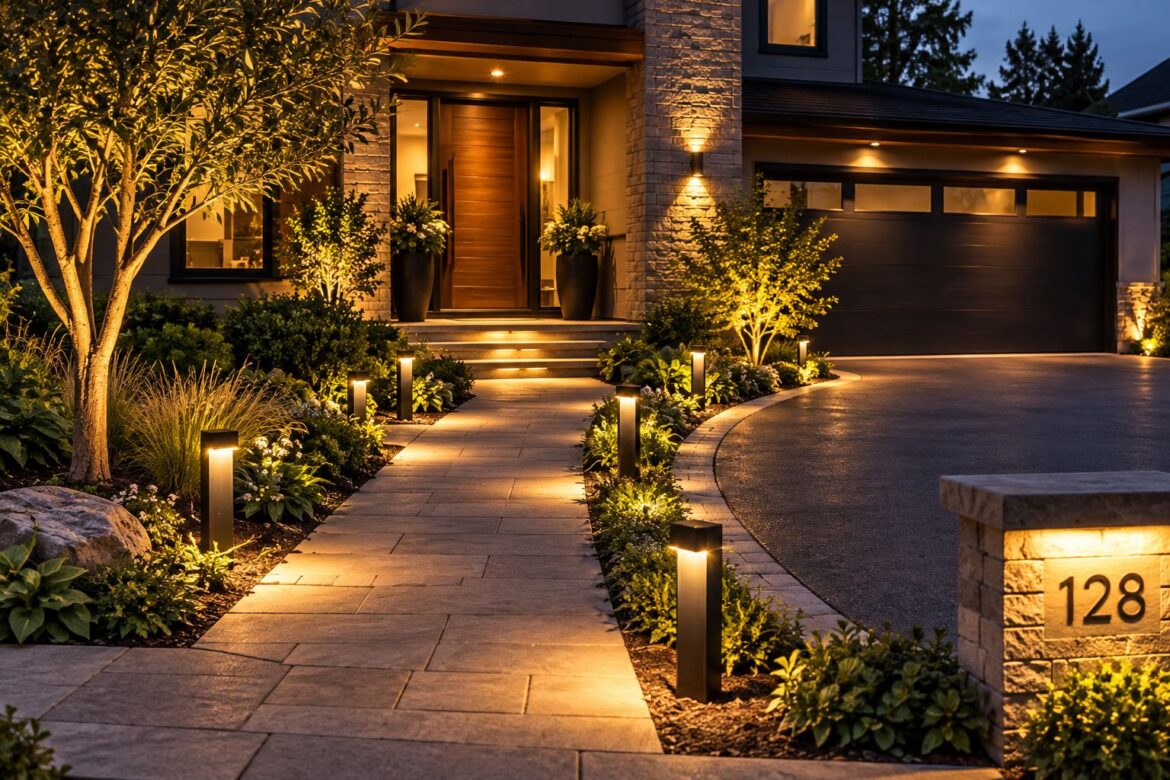
Instead, alternate fixtures from one side of the path to the other and adjust the spacing according to the beam spread. Place lights near curves, steps, gates, and changes in elevation rather than treating every foot of the walkway equally.
Landscaping can help the arrangement feel natural. A fixture positioned near ornamental grass, a low shrub, or a stone border becomes part of the garden composition. Leave enough clearance for mature plant growth so leaves do not block the light several months later.
Choose Fixtures That Direct Light Downward
The shape of a path light affects comfort as much as its brightness. Fixtures with wide hats, shields, or louvered openings generally direct light toward the ground while reducing direct views of the light source. This is especially useful along paths where fixtures are close to eye level for children or seated guests.
Unshielded bulbs may look bright from a distance but can make the surrounding ground harder to see. The eyes adjust to the intense source, causing nearby shadows to appear deeper. A softer downward beam often provides better practical visibility.
Homeowners comparing broader landscape lighting should consider how path fixtures will work with porch lights, wall lights, tree spotlights, and other outdoor sources. Each layer should have a specific purpose rather than competing to be the brightest feature.
Shielded path lights can reveal the walking surface while preserving the softer atmosphere of the surrounding garden.
Match Fixture Height to the Path and Planting
Taller fixtures usually spread light across a wider area, while shorter fixtures produce smaller pools close to the ground. Neither option is automatically better. The appropriate height depends on the width of the path, nearby plants, expected snowfall, and the visual scale of the property.
A very short light may disappear behind groundcover or become buried after heavy snow. An unusually tall fixture beside a narrow walkway can look oversized and may place the light source too close to a person’s line of sight.
Check the fixture’s total height as well as the location of its light source. Two products with similar overall dimensions can distribute illumination differently because of their shade shapes and mounting designs.
Test the Beam Spread Before Buying the Full Set
Product photographs cannot always show how a fixture will perform in a particular yard. Wall colors, paving materials, plants, and surrounding darkness all affect the result. If possible, test one or two fixtures before completing the entire project.
Temporarily position them after sunset and observe the width of the illuminated area. Move the lights farther apart until the pools overlap slightly or provide a clear visual rhythm without leaving hazardous sections dark. This test can prevent overbuying and reduce the amount of cable, digging, and adjustment required later.
When reviewing path lights, compare beam direction, fixture height, color temperature, power requirements, weather rating, and available finishes. Style matters, but light distribution determines whether the fixture actually improves the walkway.
Keep the Light Warm and Moderately Bright
Front walkways rarely need cold, high-intensity illumination. Warm white light generally feels more welcoming and complements brick, wood, stone, mulch, and green plants. It also creates a comfortable transition between the outdoor path and the lighting inside the home.
Brightness should be evaluated as part of the complete system. Ten moderate fixtures can produce more total light than expected, even when each one seems relatively dim. Nearby porch and garage lights may already contribute substantial illumination.
Aim for enough light to identify the path surface and its boundaries. Decorative planting beds can remain darker so the walkway is visually clear without flooding the entire front yard.
Plan the Power Source and Cable Route Carefully
Solar fixtures are convenient where wiring is difficult, but their performance depends on daily sunlight, panel position, weather, and battery condition. A location shaded by the house or mature trees may not collect enough energy for consistent nighttime operation.
Low-voltage and other hardwired systems can offer more predictable performance, but they require compatible fixtures, correctly sized transformers or power supplies, and properly planned cable runs. Check the operating voltage of every component rather than assuming all outdoor products work together.
Cables should be routed away from edging tools, aeration areas, drainage work, and places likely to be excavated during future planting. Electrical connections and installation methods must follow manufacturer instructions and local requirements. When the system design is uncertain, consult a qualified landscape-lighting professional or electrician.
Protect the System From Weather and Yard Work
Outdoor lights are exposed to sprinklers, rain, soil movement, lawn equipment, heat, and freezing conditions. Select fixtures rated for their intended environment and avoid placing them where water regularly collects. Stable mounting is important because a tilted fixture can send light into someone’s eyes instead of onto the path.
Think about routine maintenance before installation. Fixtures should remain reachable for cleaning and adjustment. Mulch, grass clippings, insects, and mineral deposits can reduce light output over time, while growing plants may redirect the beam.
Use Controls That Follow the Household’s Routine
A photocell can activate the system at dusk, while a timer or smart control can turn it off after the household’s usual active hours. Path lighting does not always need to operate at full brightness until sunrise. A scheduled system provides guidance when people are likely to use the walkway without creating unnecessary overnight illumination.
After installation, walk the route again from both directions. Check the view from bedroom windows, neighboring properties, and the street. Small changes in angle or spacing can eliminate glare and make the lighting feel more natural.
The most successful front-walk lighting does not demand attention. It quietly shows people where to go, helps them notice hazards, and allows the home and garden to remain comfortable after dark.
Enjoy Worthview?
Add Worthview as a Preferred Source on Google to see more of our stories in Search.

Worthview Editorial Team is the shared byline for content created collaboratively by Worthview’s editors and contributors. Since 2008, we’ve published thousands of articles across technology, AI, finance, health, home, travel, and lifestyle. Our editorial process emphasizes original research, reputable sources, regular content updates, and clear attribution. Articles covering higher-trust topics, including health and finance, may also undergo review by qualified subject-matter experts.